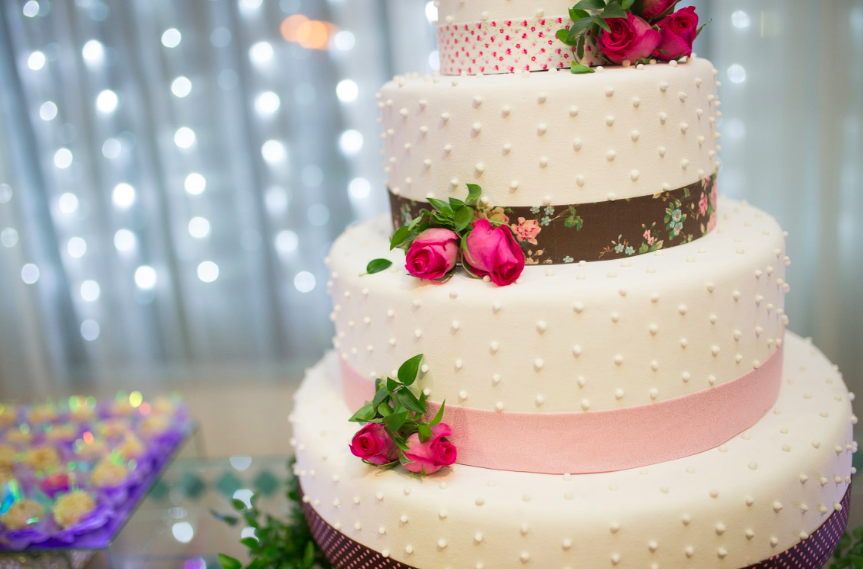
Hooray, it’s time to throw a party. From birthdays to weddings, there is no better way to celebrate than with a delicious homemade cake. Having a collection of unique cake decorating ideas is guaranteed to make you the life of any party or get-together.
Naturally, cakes are perfect for any occasion. The good news is that you don’t have to be an expert chef to please a hungry crowd.
However, putting cake decorating ideas to work in the kitchen may require a few inexpensive pieces of equipment.
What You Need
So how do you put cake decorating ideas into practice? Fortunately, making a delicious cake is easier than you might imagine. All you need is a good recipe and a few pieces of equipment.
Specialty items
Depending on your kitchen setup, you might need to look into purchasing a few specialty items.
Shape it
We have all seen store-bought cakes adorned with butterflies, flowers, borders, and the like. Have you ever said to yourself, “How in the world did they do that?” Chances are, they used a mold.
Amazon, Walmart, and other online retailers offer a wide array of molds for use with fondant and modeling chocolate. Using one of these molds might be the best way for you to make your cake decorating idea a reality.
For those unfamiliar with the term, fondant is basically edible playdough for cooks, and you can purchase it online. On the other hand, it is easy enough to make yourself from scratch. If you want, you can try this recipe at home. To make it, you’ll need butter, marshmallows, vanilla extract, and confectioner’s sugar.
One final word on fondant: you can change its color by simply adding food coloring. However, be sure to add it a little at a time so the color is not too intense.
Cutting edge cakery
Similarly, a wide variety of sculpting tools are available online and at local retailers. Each cake you bake becomes a one-of-a-kind creation by using these tools instead of molds. Additionally, for a few dollars more, you can purchase kits that include sculpting tools, letter cutters, and molds.
Do-it-yourselfers will love the ability to make their unique cake decorating ideas a reality using these toolsets. Additionally, you can use sculpting tools to clean up any boo-boos you might encounter using the cake decorating ideas detailed below.
Get your squeeze on
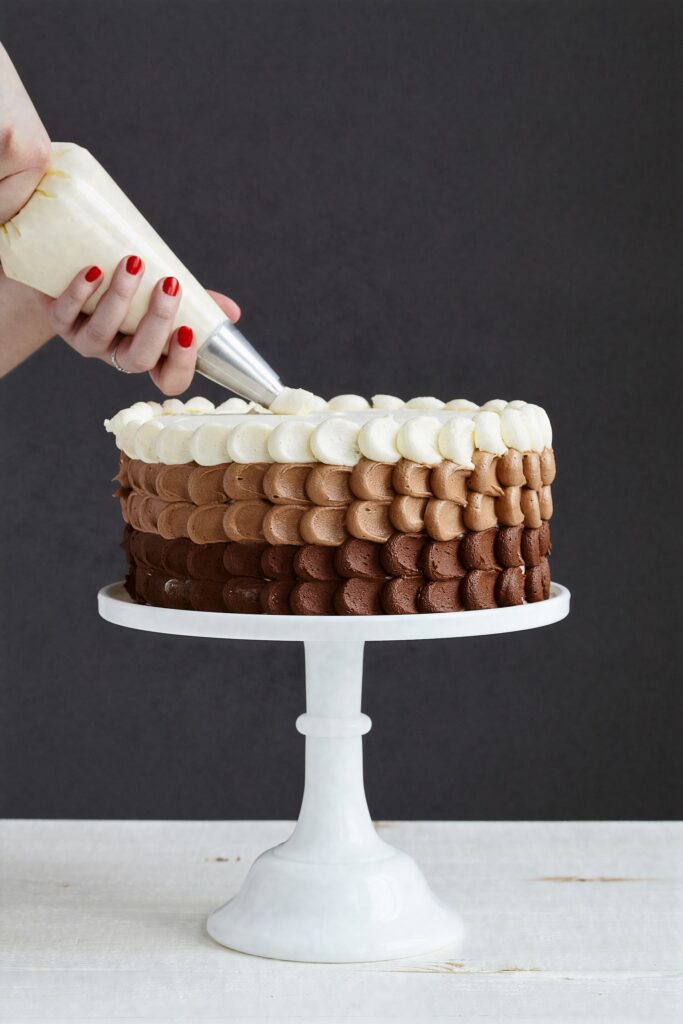
For the more traditional-minded, there is nothing quite like using an icing piper. You can purchase a variety of cake piping sets online that include pastry bags, reusable couplers, and an assortment of stainless steel tips.
With a little practice, you can make flawless roses, leaves, and trim for your cakes in no time. All you need to do is fill the bag with icing, select a shaped tip, and your cake decorating ideas become a reality in seconds flat.
Smooth perfection
Lastly, a variety of spatulas and smoothers are available online for shaping and smoothing icing. These work great along with cake piping sets to smooth out rough edges and to add texture.
These tools are another great way to turn your cake decorating ideas into a unique celebration for family and friends.
Basic kitchen items
There are a few everyday kitchen items you will need to make your cake decorating ideas a reality.
Mix it up
Having a good set of mixing bowls is vital to any cake-making effort. Stainless steel mixing bowls are popular these days. However, I prefer using pyrex mixing bowls because they don’t absorb stains or odors.
To the oven!
Traditional cake pans come in a variety of shapes and sizes. For example, you can purchase round ones, square ones, and rectangular ones.
Additionally, you might find novelty pans a useful way to make your cake decorating ideas come true. Novelty pans are available in a variety of shapes such as hearts and flowers.
Similarly, bundt pans and angel food cake pans are another great way to put your cake decorating ideas to work.
Prepping Your Cake
Okay, so now you baked your cake. What’s next?
There are four remaining steps before you can start the final design stage.
1. Just a bit off the sides
Trimming the edges of your cake lets you moisten the cake layers with simple sugar syrup. This process keeps the cake from drying out.
Firstly, let the cake cool so it doesn’t tear when you cut it. Next, place your cake on a flat cutting board. Then, place your palm on the top of the cake and gently begin scoring the edge around the perimeter.
Lastly, repeat the process with the top of the cake. If you have multiple layers, score the bottom of the middle layers as well.
2. Put a coat on
A crumb coat is basically a layer of simple sugar syrup that traps any crumbs. Therefore, when you apply the final layer of frosting, you end up with a smooth, crumb-free covering.
First, take your cake and place it on a cake circle, a piece of parchment paper, or wax paper. Next, gently apply a coating of simple sugar syrup with a brush. Lastly, let it sit until completely dry before going to the next step.
If you want, you can easily make simple sugar syrup at home. Combine a cup of sugar and water in a medium saucepan. Bring the water to a boil, and stir until the sugar dissolves. Lastly, let it cool down for a few minutes.
3. Layer it up
Now it’s time to put your layers together and apply the base layer of frosting to your cake.
First, take a spatula or smoother and place a healthy dollop of frosting on top of the cake layer. Next, gently spread the frosting evenly, almost to the edge.
Continuing, you place the next layer on top, making sure the layers line up evenly. When you reach the top layer, spread the frosting to the edge. Likewise, place a few dollops of icing on the side and spread it evenly.
Lastly, make one final pass with your spatula to smooth out any rough spots and place the cake in the fridge until it is firm.
4. Final frost
Apply the final coat of frosting to the top and side of the cake using the steps above. However, this time be more generous with the amount of frosting you use.
Lastly, take the tip of your spatula and add swirls and peaks to your frosting to make it fluffy. Inversely, you can use your spatula to give your cake a smooth finish.
10 Unique Cake Decorating Ideas
Now comes the fun part. Finally, it’s time to put some exciting cake decorating ideas into practice.
1. Watercolor cakes
No products found.
This technique is one of our favorite ways to put our cake decorating ideas to good for the whole family. Above all, it couldn’t be any simpler. All you need is a set of liquid gel food coloring, a clean, “food only,” paintbrush, and either some clear liquor or alcohol-based flavoring such as vanilla extract.
Firstly, frost your cake using white frosting and a smooth finish. Next, grab a small bowl for each color you plan on using and place a quarter of an inch of liquor or extract in each one.
Continuing, use toothpicks to place a dab of food coloring gel into each bowl and stir. Remember, the more gel you use, the more intense the color you get. For a true watercolor effect, you will want to use a limited amount of gel.
Next, take a paintbrush and randomly splash your cake with your colored mixtures. Remember, you will need to rinse your brush between colors so you don’t end up with dull grey or black from mixing colors.
Above all, this is great fun for both children and artistic-minded adults. And what a way to turn your cake decorating ideas into fun times for all!
2. Blossoming cookies
Here’s another excellent cake decorating idea that is great for the entire family.
Firstly, frost your cake using white frosting and a smooth finish. Next, provide your guests or family members with a generous amount of green apple belt candy.
Continuing, give them a pair of clean safety scissors and have them make stems and leaves. Please note, you can precut these pieces for younger children. Next, have them gently press the stems and leaves around the edges of your cake.
Lastly, they can place vanilla wafers above the stems for the flowers. If you want to get fancy, you can also set a small dab of frosting in the middle of the candy and place an M&M in the center to complete the flower.
3. Pull a Jackson Pollock
This splatter paint technique is yet another great way to get friends and family involved in new cake decorating ideas.
Again, you will start with a cake that is prepped using white icing. However, in this instance, it doesn’t matter whether you opt for a smooth or textured finish. Place the cake in the freezer for 8 to 10 minutes to get the frosting hard.
Continuing, take a small bowl for each color you plan on using and mix a half cup of powdered sugar with a tablespoon of milk, water, vanilla extract, or clear liquor. Next, using a toothpick mix in a few drops of gel food coloring to complete your splatter paint.
Lastly, grab a fork or spoon and use it to drizzle your splatter paint across the top of your cake. Be sure to let your splatter paint drip down the sides of the cake.
4. Fruity cakes

Although this is one of our simplest cake decorating ideas, it is also one of the tastiest.
Firstly, you want to start with a cake using white icing. However, be sure you use a slightly thicker layer of frosting than usual to help hold up the toppings.
Next, head out to the local farmers’ market and grab some fresh fruit and berries. For dramatic effect, we recommend you buy strawberries, blueberries, and raspberries.
Continuing, thinly slice your strawberries and gently press them into the icing on the bottom tier or one-third of your cake. Repeat this process using blueberries for the middle section, and raspberries at the top. That gives you three horizontal stripes of color in an alternating red, blue, red pattern.
Lastly, place a sprig of mint leaves on the top of your cake for a splash of green.
5. Floral bouquet

Of all our cake decorating ideas, this is the only one that includes real flowers.
To begin, frost your cake using white frosting and a smooth finish. Next, head out to the local farmers’ market or organic grocery and get yourself some edible flowers. Chamomile, carnations, dianthus, lilac, rose petals, and violets are some colorful options.
Be sure you buy edible flowers. Otherwise, they may contain pesticides. Additionally, you should seriously consider purchasing organic edible flowers.
Continuing, you need to prepare the flowers by carefully washing and drying them. Lastly, gently press them into your cake’s icing in a random pattern and enjoy!
One final note, to keep your flowers looking fresh, store your cake in the refrigerator.
6. Cookie cutter sprinkles
Here’s another cake decorating idea that is fun for the entire family.
To begin, frost your cake using white frosting and a smooth finish. Next, select a set of mixed cookie cutters and some colored sprinkles. We recommend this 50-piece set if you have small children for a couple of reasons. Firstly, kids love the animal shapes. Secondly, and most importantly, they are plastic and don’t have sharp edges.
Continuing, place the cookie cutters on top of the cake and grab some colored sprinkles. Then all you have to do is place sprinkles inside the mold and gently press them into the icing.
However, if you want a more dramatic effect, you can create a negative space. All you do is place the sprinkles around the outside edge of the cookie cutter instead of the inside.
7. Easy polka dot cake
Using chocolate chips or M&Ms is a quick and easy way to place polka dots on your cake.
Firstly, frost your cake as you normally would. For the best result, we recommend you go with a textured look with the frosting. Next, use your piping set with a star tip
Lastly, gently press chocolate chips or M&Ms into the frosting.
8. Psychedelic 60s cake

All you need is a bag of multi-colored sprinkles for this technique, making it one of our simplest cake decorating ideas.
To begin, frost your cake using whatever color frosting you want and a smooth finish. Next, and most importantly, place your cake on a sheet pan or large garbage bag. You will make a mess while preparing this cake.
Continuing, tilt your cake slightly and begin pressing sprinkles along the edge using an offset spatula. However, if you have kids, you might want to go ahead and let them enjoy using their hands. Lastly, cover the top with sprinkles and, voilà, it’s time to eat.
RELATED READS: How to Begin Working with Fondant
9. Fondant cake
Here is a fun cake design using cake molds. To start, frost your cake using white frosting. You can use a smooth or textured finish, either works great.
Continuing, lightly dust your mold with cornstarch, making sure you tap out any excess. This prevents your fondant from sticking to the mold.
Next, begin easing fondant into the mold with your fingers. For best results, you should dust the fondant with more cornstarch and use a rolling pin to press it firmly into the mold.
Next, take a paring knife and trim any excess fondant from the mold. Lastly, turn the mold upside down and twist the mold, and your fondant should fall out. Now, all you have to do is press your fondant onto your cake’s icing, and you’re finished.
10. Rainbow open star tip cake

Last, but not least, here’s our final cake decorating idea. All you need is some frosting, food coloring, and a piping set equipped with star tips.
There are no rules for this cake. Firstly, frost your cake with white frosting and a smooth finish. Next, mix a cup of frosting with a few drops of food coloring until you get the color intensity you want. Repeat this step to create at least three different colors.
Continuing, using your piping kit and a large-sized star tip create a series of stars along the top of the cake. Repeat this step with the other colors and different sized tips.
You can use as many colors and tip sizes and designs as you like. Below is a video showing you how to use a piping kit to create this cake.
Get Started!
Nothing says special occasion like serving up a one-of-a-kind cake. So what are you waiting for? Get started with turning your cake decorating ideas into delicious treats today.
Happy eating!
Do you have any easy cake decorating tips to share? Tell us about them in the comments!
Last update on 2025-04-19 at 03:49 / Affiliate links / Images from Amazon Product Advertising API



Pingback: Safeway Bakery Review: Prices and Quality
Pingback: Target Bakery Review - All Cake Prices in 2022 (With Pictures)
Pingback: Stop and Shop Bakery Review in 2022 (with Lists of Products)