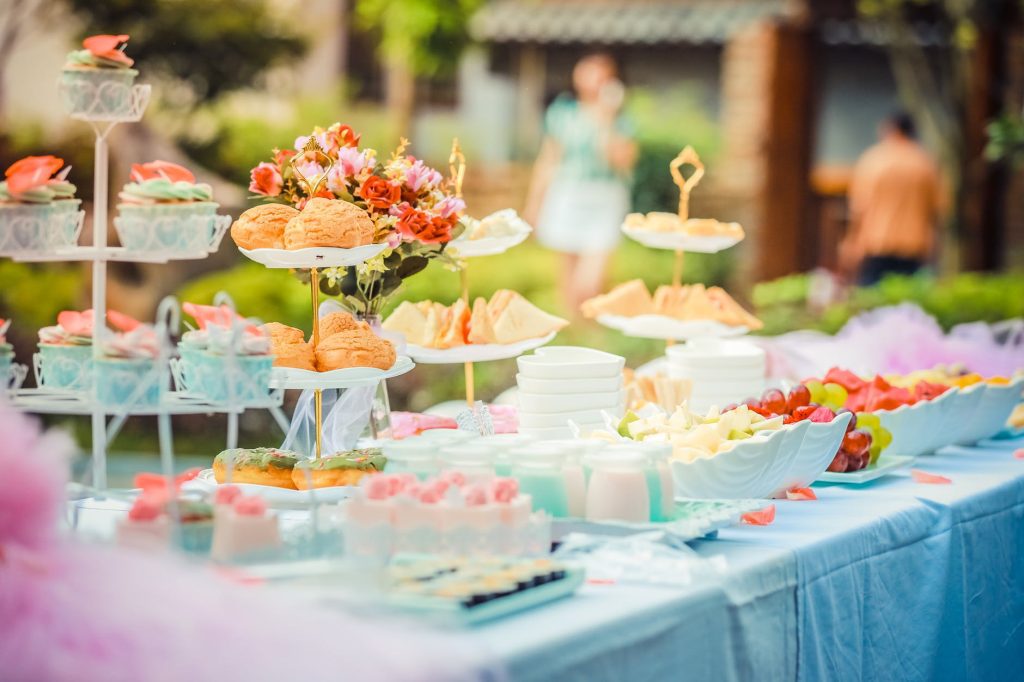
Planning a baby shower is a lot of fun, and the cakes for these events are a critical part of the planning. Not to mention that the cake is often the centerpiece of the entire party. That means it is vital that the cake you choose to be as cute as possible. No pressure!
Not only do you want to wow the expecting mother and father, but you want to wow the guests too. To do that, you need a spectacular cake recipe. That’s where we come in. So, this article will give you 3 incredible recipes for some boy-themed baby shower cakes and all the instructions you’ll need.
Baby Shower Cakes for Boys
If you are looking for a cute and relatively simple cake for a boy-themed baby shower, below are some 3 of our favorite recipes.
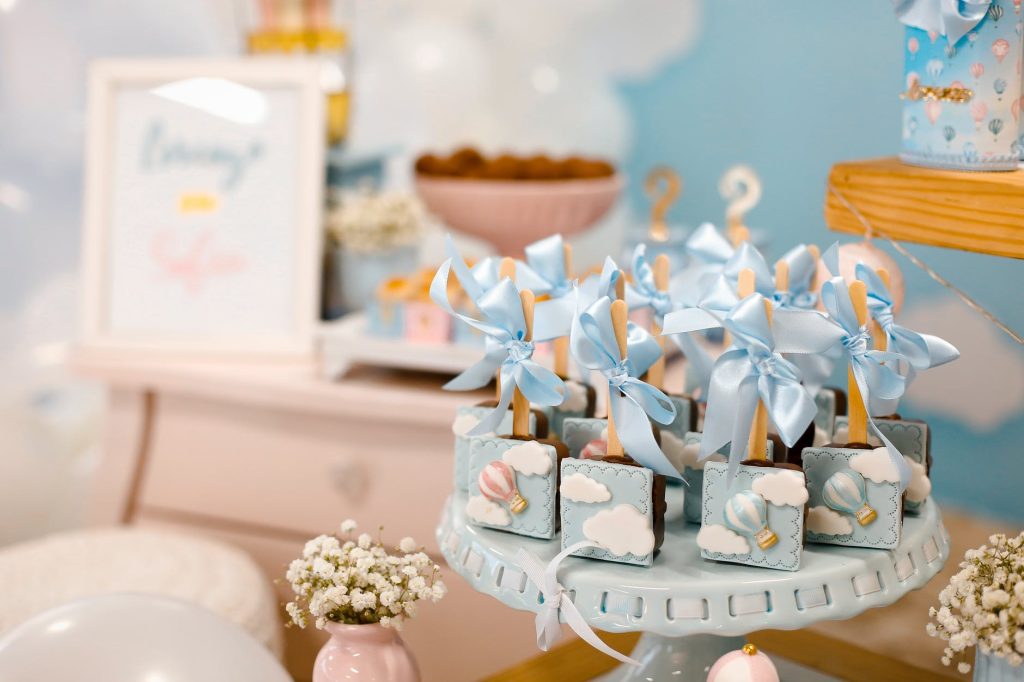
1. Baby elephant cake
The recipe for this cake uses seven-inch cake pans. If you are feeding a lot of people, you may want to add some extra layers or just make two baby shower cakes.
Ingredients
- 1 3/4 cups all-purpose flour, sifted;
- 1 1/2 teaspoons baking powder;
- 2/3 cup unsweetened cocoa powder, sifted;
- 2 large eggs, room temperature;
- 1 1/2 teaspoons baking soda;
- 1 teaspoon salt;
- 2 cups granulated sugar;
- 1/2 cup canola oil;
- 2 teaspoons vanilla extract;
- 1 cup buttermilk or whole milk;
- 1 cup hot water;
- Chocolate frosting;
- Vanilla frosting;
- White fondant;
- Blue gel food coloring;
- Grey gel food coloring;
- Elephant stencil.
Directions for cake
- Package: One package contains 30pcs colorful ball cake toppers in 4 colors, including dark blue,blue,white and...
- Size: The ball cake topper has 4 sizes, including 0.79 inch, 0.98 inch, 1.18 inch and 1.57 inch.
- Material: Colorful ball cake topper is made of foam and latex wire.
First, preheat the oven to 350F. Then, grease two 7-inch cake pans that are at least 2-inches deep. Dust cocoa powder in the greased pans and set aside.
In a large bowl, mix flour, baking powder, cocoa powder, baking soda, sugar, and salt until combined. Mix together eggs, oil, vanilla, water, and buttermilk in a medium bowl until smooth.
Next, combine the wet and dry ingredients, mixing gently until smooth. Your batter will be thin when it is combined. Divide the batter between two pans and bake for 30-35 minutes or until a toothpick is inserted and comes out clean.
Allow the baby shower cakes to cool completely and then slice them in half. You will have four round cakes after cutting them. Put a dab of chocolate frosting on a rotating cake pan, gently push a layer of cake down. Add frosting to the first layer, spread evenly, and then place the second layer. Repeat this process until all four layers are stacked. After the cake is stacked, add vanilla frosting to the top and around the sides. You only need a thin layer at this point. Chill the cake for 25 minutes. After it has chilled, add the final coat of vanilla frosting.
Decorating directions
Take some white fondant, knead it and create a well in the middle. Add a few drops of blue gel food coloring and then continue kneading until the fondant is light blue. Roll the fondant out until it is wide enough to drape over the cake. Place it on the cake, smooth it with your hands, and your fondant smoother to remove air. Trim the excess from the base of the cake.
Next, take a little bit more fondant, color it grey and make a baby elephant. Find directions for assembling your baby elephant for baby shower cakes. Place the baby elephant on top of the cake.
After you place the elephant on top, color some fondant dark blue. Roll the dark blue, light blue, white, and grey fondant out, use the stencil to cut enough elephants out to circle the cake. Press the elephants onto the cake trunk to butt. Add the elephants’ ears and little tiny tusks. Finally, either roll a bunch of tiny balls to place at the base of the cake or add piping in buttercream.
Last but not least, you can watch the video below for visual instructions:
2. Blue hydrangea cupcakes
This recipe is obviously not a cake, but these babies will knock the socks off of your guests anyway. It makes a dozen cupcakes, so if you are feeding a lot of people modify the recipe accordingly.
Ingredients
- 1 cup granulated sugar
- 1 1/2 cups all-purpose flour measured correctly
- 1/4 cup unsweetened cocoa powder
- 1/2 teaspoon salt
- 1 teaspoon baking soda
- One cup freshly brewed warm coffee
- 1 tablespoon white vinegar
- 2 teaspoon vanilla extract
- 1/3 cup olive oil
For frosting:
- 1 stick softened, unsalted butter
- 1 1/2 cups powdered sugar
- 1/8 teaspoon fine sea salt
- 8 oz cream cheese, room temp and cut into 8 pieces
- Blue, white, yellow gel food coloring
Cupcake Directions
Preheat the oven to 350˚F and add cupcake papers to your pan. Combine flour, sugar, baking soda, salt, and sift the cocoa powder, mix until smooth. Next, in a medium bowl, whisk coffee, vinegar, vanilla, and olive oil together. Then combine your wet and dry ingredients until just combined, your batter will be lumpy. Finally, spoon mixture into cupcake pan until cups are about two-thirds full, bake for 18-20 mins. When you finish baking the cupcakes, cool them on a wire rack.
Next, with an electric mixer on low, beat butter, salt, and powdered sugar together for one minute. Turn the speed up to high and continue beating the frosting until it is light and fluffy. After that is fluffy, add one piece of cream cheese at a time and continue beating until it is fluffy again.
Separate the frosting into three bowls, add a few drops of food coloring and mix together until you get your desired color.
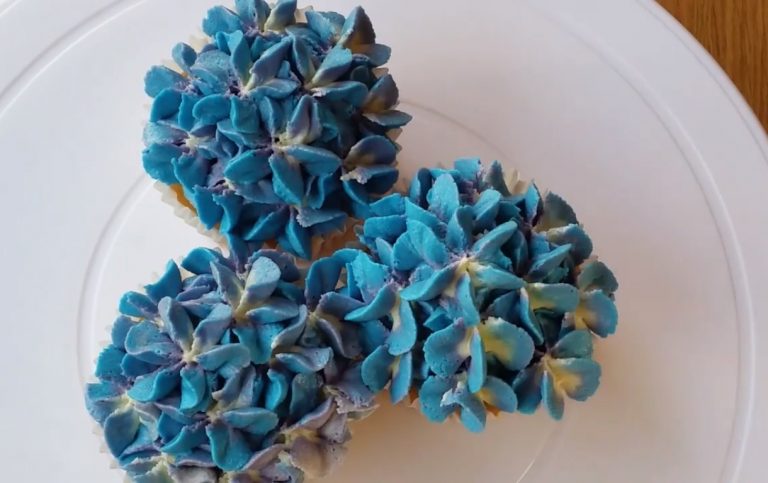
Now it is time to decorate! Lay a piece of plastic wrap on your counter. Put some of the blue frostings down first. Spread white frosting on top of the blue and spread yellow on top of the white. It will basically look like the photo below:
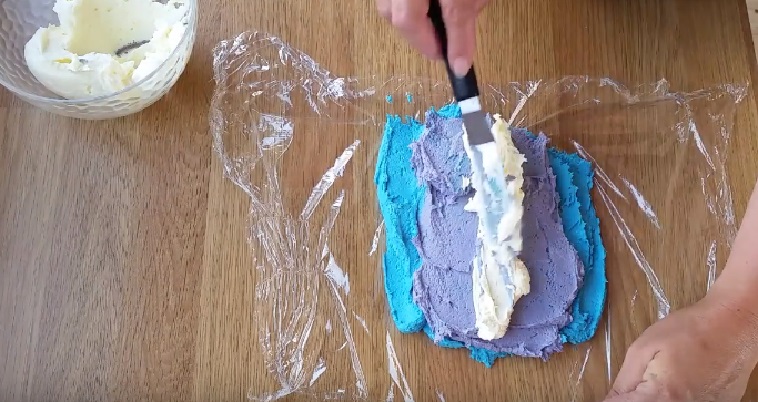
After you have layered the frosting, twist the plastic wrap closed, cut one tip-off, and add it to a piping bag with a size 2D piping tip. Grab a cupcake and start squeezing a bit out at a time to make a cluster of frosting flowers. Repeat with each cupcake, place on a cupcake stand, and serve.
Last but not least, you can watch the video below for visual instructions for decorating:
3. Blue Geode Cake
This cake is a little bit more complicated than the other two. Geode cakes are popular as wedding cakes or baby shower cakes. You will want to bake two 6-inch and two 8-inch round baby shower cakes in advance. Here is a fabulous recipe for white cake. Below are the steps for decorating with an ingredient and supply list.
Ingredients
- Two 6-inch and two 8-inch round cakes;
- Buttercream frosting;
- Blue fondant;
- White fondant;
- 3 shades of blue rock candy on a stick;
- Clear rock candy on a stick;
- Large light blue rock candy on a string;
- Clear piping gel;
- Edible gold leaf;
- Wooden dowels;
- Edible ink pen.
Decorating directions
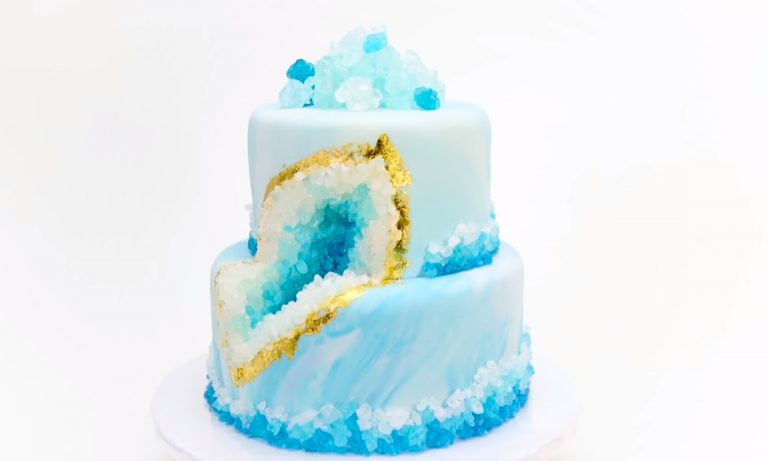
First, layer the two 8-inch cakes with buttercream between layers and cover the entire cake in a thin layer. Place the large cakes on a cake board. Then repeat the process with the smaller of the baby shower cakes and place them on a thin, round cake board.
After you’ve prepared the baby shower cakes, roll out two long logs of white fondant. Roll out another log of blue fondant and twist all of the fondants together. Roll the fondant until it is marbled. You will then need to roll out to circles of fondant, one that is 16 inches and one that is 14 inches.
Drape the fondant over its corresponding baby shower cakes and smooth it out, cutting away excess at the bottom. Next, stick three dowels into the 8-inch cake, making them flush with the cake. These dowels will support the top tier, added next.
Create the geode
Next, draw a long oval, half on the bottom tier and half on the top tier, with your edible pen. Afterward, use a knife and remove a deep chunk of cake where you drew the oval.
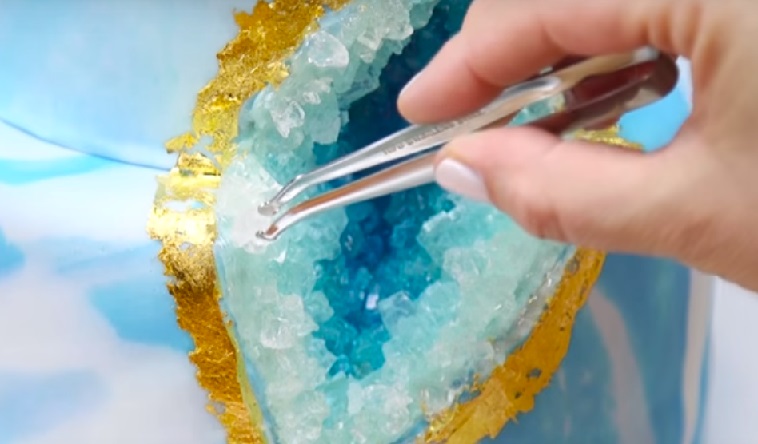
Additionally, you will need to use some buttercream to cover the cake you just exposed and then piping gel. In the center of the groove add some dark blue rock candy. As you move outward, add the lighter shades. This gives your geode an authentic look.
Next, place your edible gold leaf between two sheets of transfer paper and cut it into thin strips. Finally, for the last step of the geode, brush water around the edges of the oval and press on the gold leaf. Fill in the gaps between the gold leaf with clear rock candy. It will look like the photo below:
Next, at the base of your cake, squirt piping gel and place dark blue rock candy all around. Above it repeats the process with light blue candies and above that use the clear candies. Also, repeat this process on the second tier. In all, you will have six rows of rock candy.
Finally, add some piping gel to the top of the cake and place the large rock candy on top of it. Last but not least, you can watch the video below for visual instructions:
Good Luck Wit Your Baby Shower Cake!
Finally, remember to have fun baking your cakes. Baking is a time when you should be able to unwind, relax and let your creativity flow. In fact, don’t be afraid to come up with your own idea for baby shower cakes. Just enjoy yourself while doing it. Also, let us know in the comments section below what ideas have you discovered and how did you impressed the future parents. Not to mention that any further questions you have regarding this article are expected in the comments too.
Happy Caking!
Last update on 2025-03-25 at 06:30 / Affiliate links / Images from Amazon Product Advertising API




Pingback: Portos Cake Prices in 2022